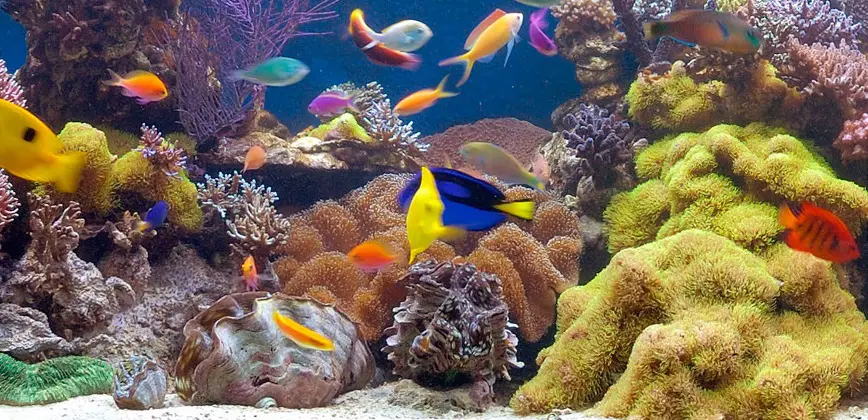
Having an aquarium of your own full of colorful fish is a wonderful thing. It’s relaxing and enjoyable. And since each fish tank is unique – designing, setting up, and maintaining your own is not just a hobby, but a form of artistic expression as well. Once complete and operational, your aquarium is something you’ll want to share with your family and friends.
A beautiful aquarium has a calming affect. It reduces stress and helps put people at ease. So it’s no surprise that aquariums are often seen in dental and medical office waiting rooms. But when you have one at home, you can enjoy it anytime you wish.
Contents
- 1
- 2 For the Best Aquarium – Take Your Time
- 3
- 4 Number 1: Planning Your Aquarium
- 5
- 6 Number 2: Preparation – Getting Your Aquarium and Stand
- 7 Number 3: Positioning – Set Up Your Aquarium In A Good Location
- 8
- 9 Number 4: Adding The Filter
- 10
- 11 Number 5: Adding Gravel To Cover The Bottom
- 12
- 13 Number 6: Adding Plants and Other Decorations
- 14 Number 7: Observe and Adjust
- 15
- 16 Number 8: Fill the Tank with Water
- 17
- 18 Number 9: Install The Heater
- 19 Number 10: Add Your Water De-chlorinator
- 20 Number 11: Cycle Your Tank
- 21 Number 12: Add Your Chosen Fish
For the Best Aquarium – Take Your Time
If this is your first time setting up an aquarium, there are a lot of details to consider. Just don’t let all the choices, equipment, and gadgets overwhelm you. If you take it one step at a time and follow along as suggested here, things will tend to go much more go smoothly for you.

Sure, there are a lot of different pieces to the aquarium puzzle. And it requires plenty of patience to get your tank perfectly prepared before you can safely add fish and enjoy the beauty of nature in your living room.
Your fish will be the stars of the show and what you want to be able to enjoy and share with others. But adding fish is actually the final step of the setup process and it takes time to get there.
You can’t just speed through the process. Instead, tackle one task before moving onto the next one, if you can follow these simple directions and enjoy the process as you go, you’ll be in good shape and you’ll get more out of the hobby.
With a little testing and maintenance on a regular basis, you’ll be able to enjoy your fish tank for years to come.
Number 1: Planning Your Aquarium
Every aquarium is a little different and you can make yours totally unique. A little planning in the early stages can go along way towards providing years of enjoyment.
While every step in the process is important, this first step sets the tone. At this point, you want to think about the kind of completed aquarium you want to have in your home.
Fish Selection and Tank Size
A good starting point is to decide on the species of fish you want to have in your aquarium. You’re not going to buy them until you’re finished setting everything up and have established ideal water conditions. But it’s important to imagine your finished aquarium and get a sense of how it will look to you.
 Most people want a variety of fish in different colors, sizes, and shapes. But you’ll need to make sure that those fish are compatible, so they can thrive in a community environment.
Next, you’ll want to consider the size of the tank you’ll need to keep the inhabitants in a safe and healthy environment with plenty of space.
Most people prefer having a larger community fish tank. But you could also have a smaller, species-specific tank, or even a breeding tank. The ladder two options are best saved for more experienced aquarists – not beginners.
Ultimately, it’s the type of fish you want to have that determines the size of the tank and the water conditions and water hardness you’ll need to establish before adding any fish.
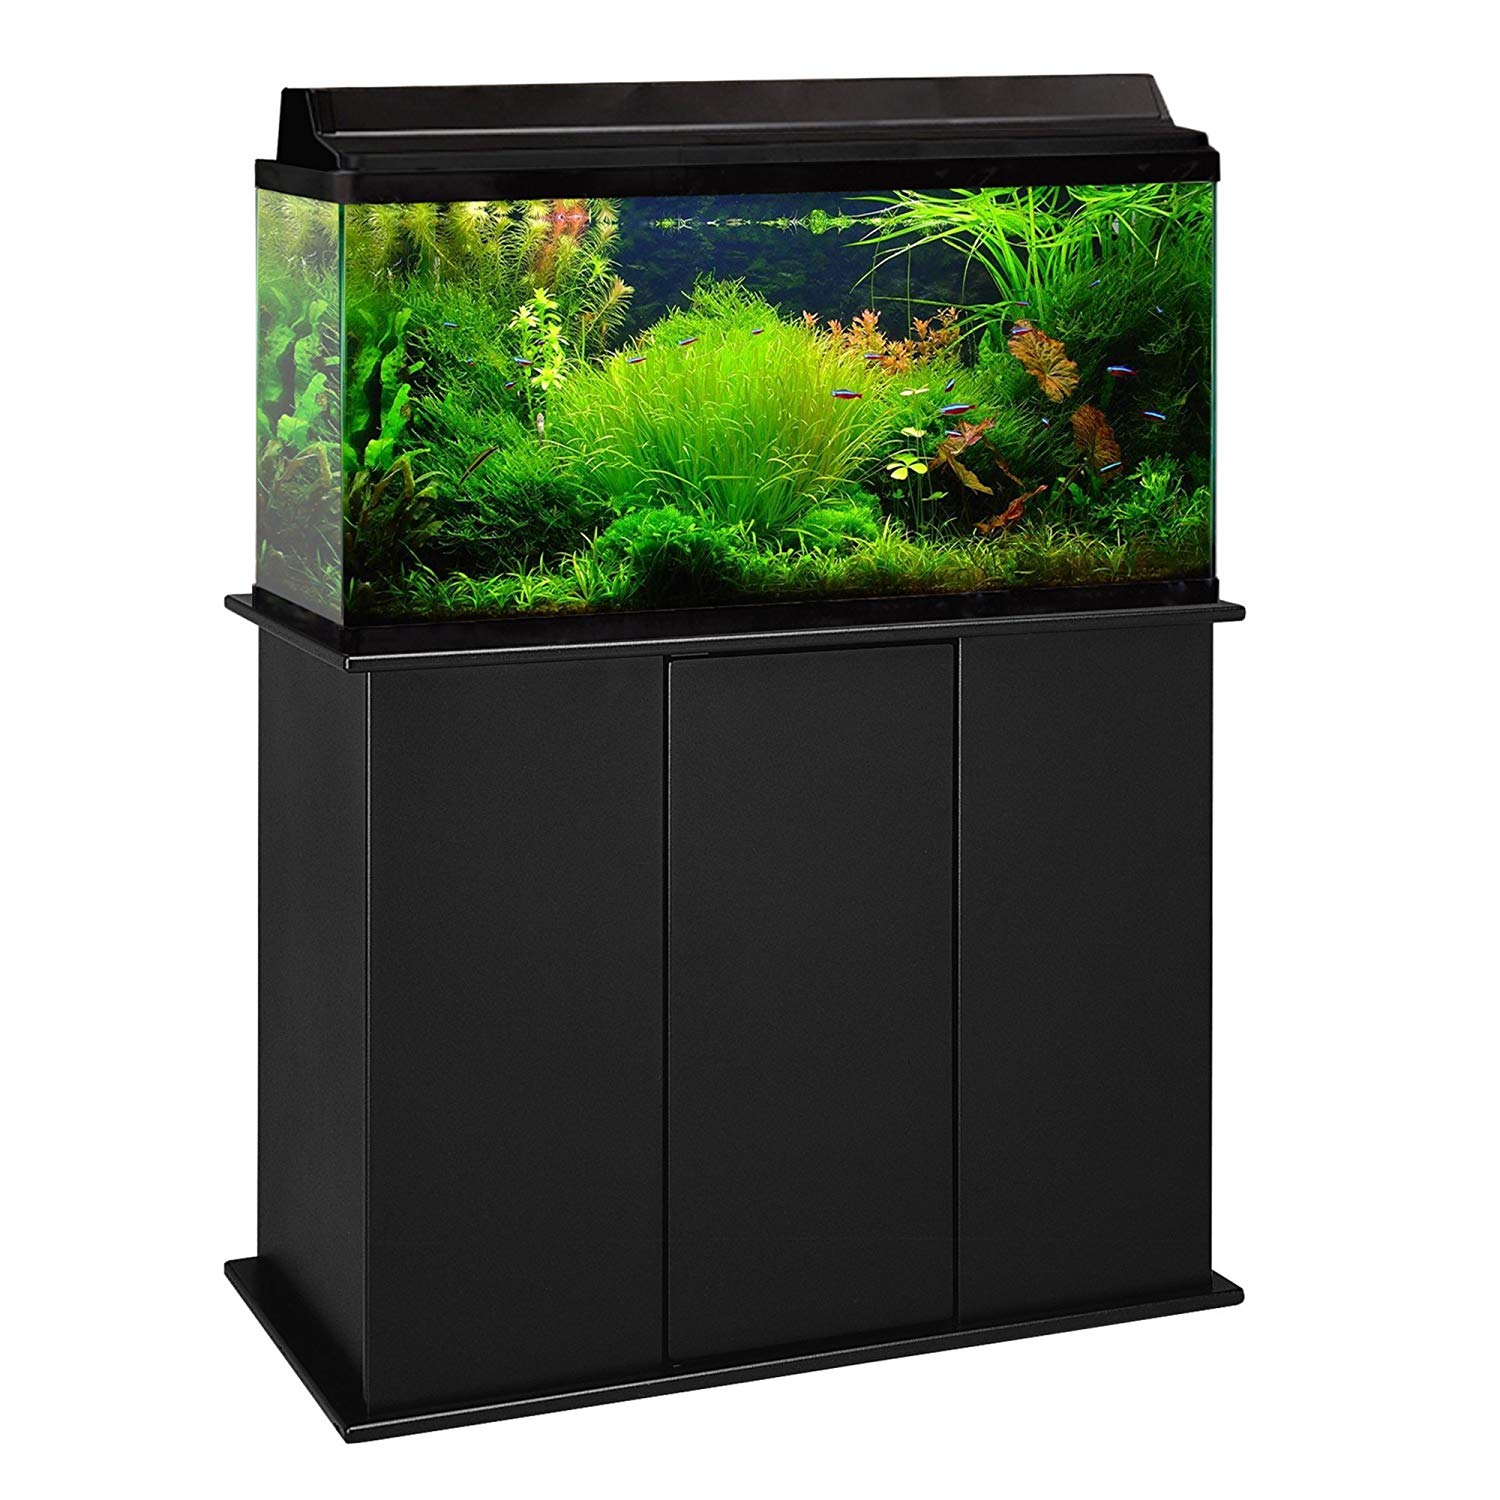
Tank size is important for the type of equipment you’ll need. It’s also useful for determining additional pieces you’ll want to add to the aquarium like plants or driftwood. You can see various tanks and stands on our dedicated page – Fish Tanks and Stands.
When you have a good general idea of the various species of fish you want to keep, it’s time to start looking at fish tanks. Some get this reversed. If you think things through at the planning stage, it’s a whole lot easier.
If you know the aquarium dimensions input them into our aquarium calculator here to confirm the size of the tank – so you know how much water it will hold, this will help you work out the fish types and filter sizes etc.
Consider Essential Equipment
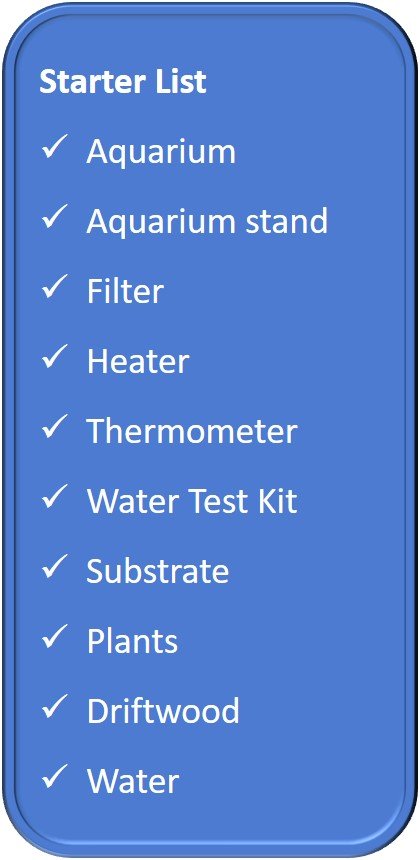
It’s also important to familiarize yourself with the various types of equipment, gadgets, and accessories you may need. It can be a little intimidating at first. But the best thing to do is to start making a list of the pieces of equipment and any other elements you may need.
Advanced planning can go along way towards creating an indoor aquarium that gives you endless enjoyment, while keeping the inhabitants healthy and content.
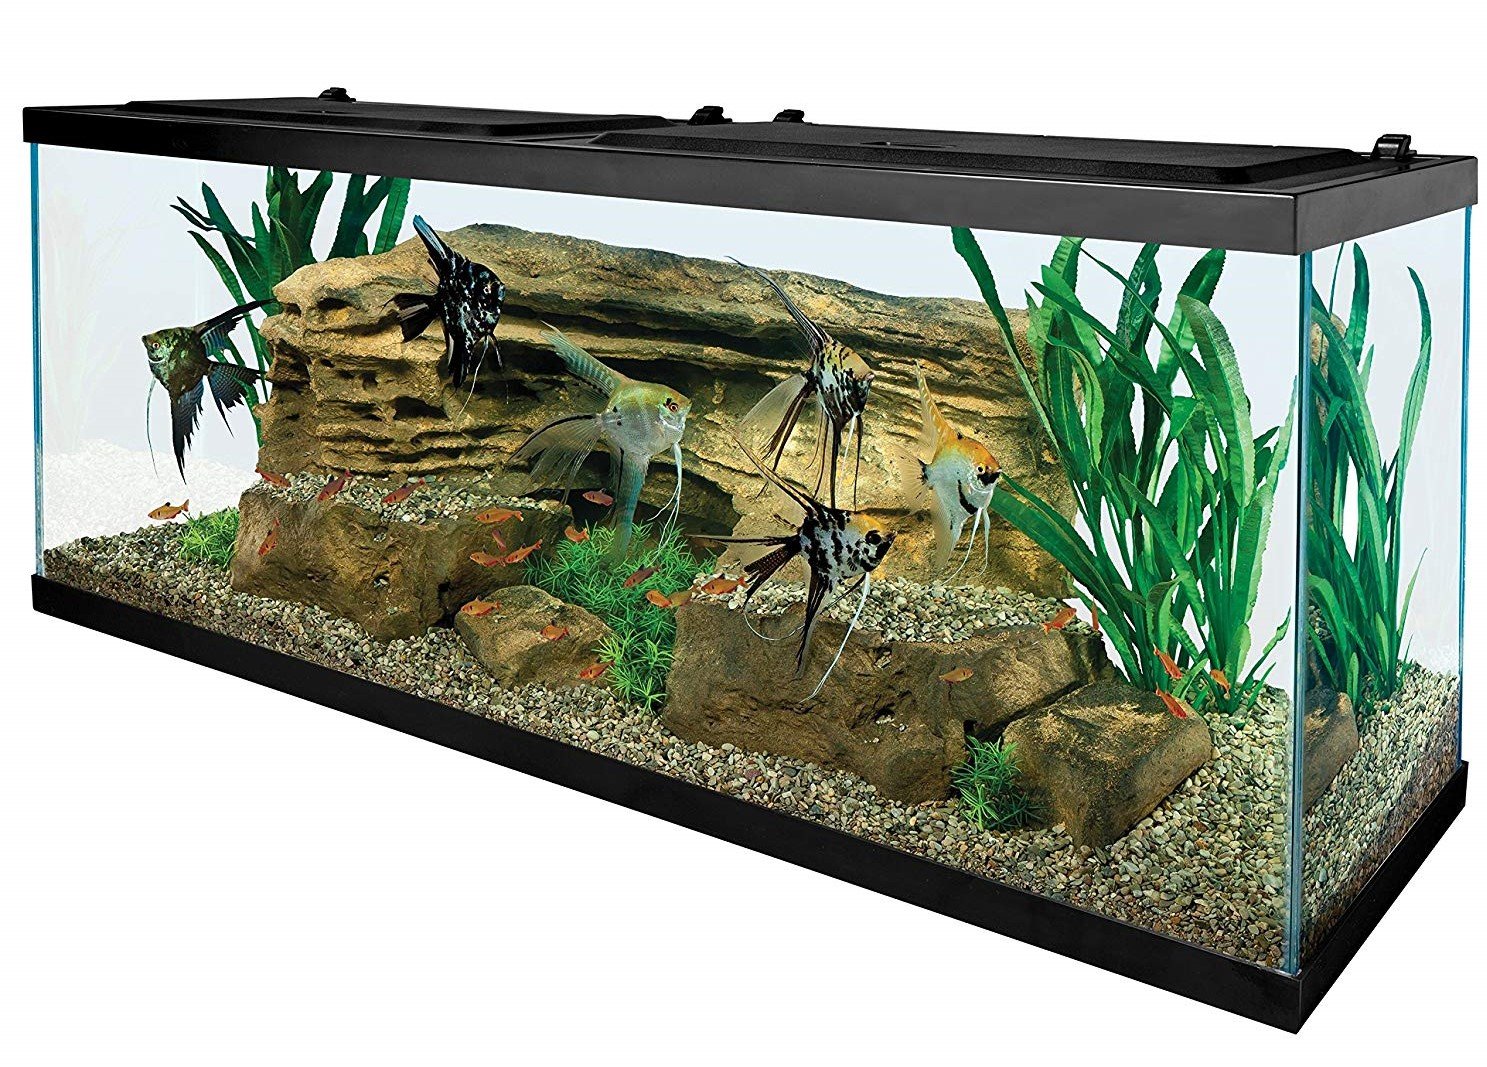
Number 2: Preparation – Getting Your Aquarium and Stand
Don’t be fooled into thinking that a smaller aquarium is the best way to get started. Small space limits your choices of fish and is as much – or more – having a larger tank. If you’re in this for the long haul, and you want a variety of fish, we recommend going with a larger tank from day one. It doesn’t have to be huge – just a large enough size so you can have a nice mix of fish inside.
Generally speaking, the larger the fish, the more space they’ll require. It’s also important to think about plants and other decorations that you want inside the tank and allow adequate space. Although these other elements do take up space, they are important to creating an aesthetically pleasing aqua-scape.
Standard tank sizes range from 10 gallons to about 250 gallons in size.
If you want to have a variety of fish, a 50-55 gallon tank is a good size.
It allows you to have quite a mix of species and can serve you for years. As a beginner, you probably wouldn’t want to go much larger than that – but you could go smaller.

Note that a 55 Gallon tank will weigh about 520 lbs without the sand or decor – water alone is heavy. That’s without fully filling it to the brim.
The stand will also be 40-50 lbs in weight to support the tank. You must consider where you are going to place your tank – we will come back to this later.
Check out aquarium dimensions, fish tank sizes and weights here.
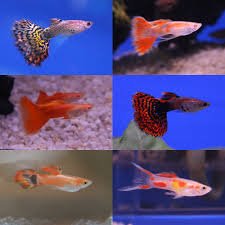
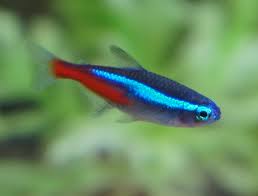
One way some people like to get started is to opt for a tank about half that size (20 – 25 gallons) and maintain a few species of hearty fish, for example – guppies, platys, and tetra.
It’s really a personal choice.
Whatever tank you buy needs to be cleaned before use. Use a clean, water-dampened cloth to wipe down the tank – inside and out – and remove any dust that has accumulated. Never use any kind of soap. The residue is enough to kill your fish.
Test For Leaks
Fill your empty tank with water to test for any leaks. It’s a good idea to allow it to sit for a few hours. If there’s no sign of leakage, you’re safe to proceed. But if you do discover a leak, fear not. Tank sealing kits are readily available and they work well in plugging any leaks you may find.
Leaks happen. Such is life. Much better to detect a problem like this before you spend hours creating your dream aqua-scape, only to fill the tank and have it leak then.
Choose the Right Stand
Any tank of 20 gallons or larger definitely needs its own compatible stand. Don’t be fooled into thinking that production furniture like a spare dresser or table will do. It won’t. You need a stand that’s designed for the dimensions of the fish tank.
The only exception would be a solid countertop that’s well supported, or custom-built furniture made to accommodate such weight. For most people, buying a stand at the same time as their aquarium is the way to go. Essentially, you want a stand that fits the tank exactly, so it will maintain its strength and integrity when filled to capacity with water.
Make sure that no edge of the tank overhangs the frame on any side. This is very important. You might have a strong steel frame that you think would make an ideal aquarium stand. But if there’s any overhang, it’s simply not a safe option to use.
Always select equipment that is rated for the size of the tank you’ve selected. This applies to stands as well as filters and heaters too.
Number 3: Positioning – Set Up Your Aquarium In A Good Location
Fish tanks can be awkward and weighty, even when empty. Loaded, they become extremely heavy. So it’s important to set up on a well-supported, level floor, with joists and/or posts underneath.
It’s important to locate your aquarium in an area that helps keep the fish healthy. Close to a window where direct sunlight can warm up the water is a definite no-no. Instead, find a spot out of the sun where the water temperatures should remain fairly consistent and the light coming inside won’t be overpowering. Too much sunlight can cause excessive algae growth and that’s a problem when you’re trying to maintain a beautiful aquarium.
You’ll also want to locate close to a power outlet – you’ll be using it to run the filter and other electric accessories. The best location is usually along a wall. Just be sure to set up the aquarium at least 5 – 6 inches away from the wall to allow extra room for the filter that fits on the back of the tank.
Set the tank up close to an outlet. That way you won’t put any strain on the power cords. It’s also a good idea to pick up a power bar with a built-in surge protector. This can help protect your equipment in the case of a power outage.
Avoid setting up too close to a vent. Dust from heating and air-conditioning systems can make it much more difficult to maintain if you’re close. It can also impact the temperature of the water. Some fish are particularly susceptible to water temperatures, while others can withstand a greater variation.
Number 4: Adding The Filter
You can use a power filter or an under-gravel filter. Exactly how the filter is installed can vary slightly, depending on the brand and type.
For the first-time aquarium owner, the easiest option would be the power filter. It hangs on the back of the tank itself. Recommended brands include Whisper and Penguin power filters. These provide both biological and mechanical filtration and are relatively easy to use and clean.
External power filters are a favorite due to the fact that they don’t take up space inside the aquarium. You simply set it into position on the outside of the tank – where it consistently distributes an outflow of water. Some tank hoods supplied come with cut outs built-in to accommodate equipment like filters. This makes it even easier to position the device.
If you opt for an under-gravel filter, know that you’ll need to vacuum the gravel that hides the filter regularly, or it will eventually clog.
Make sure the power head is of adequate strength for the size of the tank. Bigger is definitely better here. If you’re using a traditional air pump, it’s best to have two in any tank that’s 40 gallons or larger. If you’re using a submersible power head, one should be adequate.
If you plan on adding any kind of sand to your aquarium, you’ll need a power filter. Sand is just too fine for an under-gravel type of filter and is sure to clog it.
A good power filter should circulate the water efficiently. Ideally, it should filter your water five times or more every hour.
Number 5: Adding Gravel To Cover The Bottom
Once your filter is in place, you can add the gravel to the bottom of the aquarium to span the entire area. It’s important to purchase enough gravel to cover about two to three inches on the bottom of the tank.
When it comes to gravel, there are plenty of choices in a variety of colors. But whatever gravel you settle on, it’s important to clean it thoroughly before adding it to the aquarium.
Dust is a common problem and it accumulates as these materials sit in warehouses and on trucks. The more dust you can remove from the stones, the clearer the water in the tank.
The easiest way to clean aquarium gravel is to pour a small amount into a 5 gallon pail and run a hose over it. Never use soap of any kind, due to its toxic effect on fish. Water is all you need. Pour it over and stir it around with your hand to rinse off the residue. Discard the waste water and continue rinsing several times, until the water that you drain is quite clear.
Easy Does It
Only then should you add the gravel to the tank. And when you do pour the gravel in, add a little at a time, so it doesn’t scratch the glass.
Shape the gravel so it is piled slightly higher towards the back of the aquarium. This creates a nice visual effect of added depth. It’s also good way to hide an under-gravel filter if you’re using one.
When it’s time to load the tank with water, place a kitchen plate on top of the gravel substrate. This is done so that as the water pours out, it doesn’t spread the gravel around. In other words, the water is dispersed more evenly when it hits the plate first and flows wide, rather than having a concentrated flow in a single area. That would most certainly force those stones to move.
For any fish that likes the burrow, sand on the bottom of an aquarium is a good option. But it’s something that is best reserved for more experienced aquarists. It’s a little more difficult for first-time aquarium owners to set things up properly, without running into problems. You are better off sticking to gravel on your first go-around.
Number 6: Adding Plants and Other Decorations
Plants are another option to consider since they can add a significant visual appeal to an aquarium. If you’re planning to use plants in your tank, make sure you use the appropriate base material or substrate. Good options are Azoo and Amazonia.
Arrange plants and decorations for aesthetic appeal. It’s important to make it how you want at this stage. Once the tank is filled and the fish are added, you want to create as little stress as possible for them. That means you don’t want to be sticking your hands inside the tank.
Plants are natural, functional decorations that look great in any aquarium. For some fish, the plants actually help them remain healthy. Some, like goldfish, like to eat live plants.
Driftwood makes an excellent decoration in any freshwater aquarium. And if you live near a lake where driftwood regularly washes ashore, you can get it for free. But never use driftwood from the ocean in the freshwater aquarium. And anything you place inside the tank needs to be washed with water before it is set into place.
It’s important when making plant selections to keep in mind the type of fish you plan on getting as you want them to be compatible. Submerge the roots into the gravel. Some plants, like moss, will need to be secured (using a fishing line or cotton thread) until the moss becomes attached to the driftwood or stone.
Number 7: Observe and Adjust
Stand back and take a look. Is everything where you want it to be? View your layout from different points in the room. When you’re satisfied that everything looks as good as it can be and you’re happy – congratulations. You’ve already pre-tested the tank for leaks before putting anything inside. So, you’re good to go ahead now and fill the tank with water.
Number 8: Fill the Tank with Water
When filling an aquarium, leave about a 1 inch gap from the very top. Make sure there’s water in the reservoir of the filter and plug it in. Water should circulate smoothly and quietly. Give it an hour or two and then check the temperature of the water to make sure it’s still in the safe range.
Number 9: Install The Heater
Now it’s time to connect the water heater. These typically attach to the side of the tank with suction cups. It’s best to position the heater close to where the water comes out of the filter. That way you’ll get heat heated water that distributes more efficiently throughout the tank.
Most aquarium heater sold these days come with preset thermostats that range from 70 to 80°F – which is good for good for most species. Plug in the heater and install a thermometer. Only turn the heater on when the tank is completely filled with water.
Beware of Heat Generated By Lighting
Some lights, particularly those that are sold with new aquarium kits can put out an excessive amount of heat. This can be problematic when it alters the temperature of the water. It makes maintaining one temperature extremely difficult, since aquarium lights should only remain on eight to 10 hours a day – maximum.
Number 10: Add Your Water De-chlorinator
All municipal tap water contains chlorine and other chemicals that can kill fish if you’re not careful. Unless you’re using distilled water, you’re going to need a neutralizer like a de-chlorinator. At this point, you can also add a dose of Safe Start – another bacterial catalyst that can speed the growth of good bacteria. This is important to the health of your aquarium environment.
Follow the instructions that come with your de-chlorinator. On some filters, you will need to remove the activated carbon filter while the chemical circulates. Otherwise, the filter could remove the chemical before it’s had a chance to detoxify the water.
Number 11: Cycle Your Tank
This is the one step that requires the most patience. This process can take anywhere from 2 – 6 weeks.
You can’t just buy an aquarium, set it up, and load up with fish right away. That’s a surefire way to kill all your fish.
Instead, you need to establish the ideal conditions for those fish first and that means you need to cycle the tank. During the cycling phase, you need to monitor water parameters such as pH, ammonia, nitrites, and nitrates. When the numbers for ammonia, nitrate, and nitrate spike and then lower to zero – you have completed the initial cycle. At this point, your tank should be in the clear to add fish.
You may or may not also need to use an ammonia remover. The only way to reduce the amount of nitrates in the water and to keep it clean is to physically change the water. But you should only change about 15% at a time.
Your job is to routinely test the water to create the most ideal condition for your fish. Water testing is especially important when you’re first setting up your aquarium. It’s actually the most important task of an aquarist. Adding live plants is one way to help reduce the nitrates in the tank.
Number 12: Add Your Chosen Fish
Now you’re finally at the stage where you can go and buy the fish you want. If you did your planning early on, you already know what species you can safely have in the same tank without any problems. But just as creating the ideal environment requires patience, so too does stocking your aquarium.
Never buy all your fish at once. That’s a recipe for disaster. Instead, know what you want ultimately. But populate your tank slowly.
Buy two of the smallest non-schooling fish. If you’re buying schooling fish, be sure to buy a minimum of 6, to be fair to the fish.
Let the bag containing your fish from the store sit inside the tank for 20 – 30 minutes. Then open the bag and let some of the aquarium water inside. Let it sit for another 20-30 minutes. At this point, you can net the fish and place them in their new home. Be sure to discard the water from the pet store.
You can continue to introduce a new group of fish to your aquarium every two weeks following this same procedure. And always add the biggest fish last. It takes more time to do things the right way. But doing so always pays the best dividends.
I really wanna start a nice coral tank!
These are great tips. Even though I’ve had my tanks for 15+ years now, it’s always good to update my skills… like the tip about making sure the light source doesn’t give off too much heat in the fish tank- that’s something I would have never really thought about and something that my local fish store never told me about.
Thanks for the tip about not setting the tank up near a vent. I’ve got mine near one right now and have been thinking about moving it anyway.
Didn’t know about this either!!
Thanks for the starter list and great tip about adding in the fish slowly and not at one time. Ideally, how many fish would be the best if I were getting schooling fish? I know you said 6, but what’s the best number, or perhaps it has to do with the species.
I find that having fish is very relaxing. The first time I got interested in fish was when I was 12, and went into a pet store that had a wide range of fish. I found myself drawn to the fish, listening to the trickling water and staring at these beautiful creatures. I think this is when my passion for fish started. Now I only wish my wife shared my passion, lol.
That photo is beautiful, looks like one of my computer backgrounds, lol. Great aquarium setup tips too btw!!
To anyone reading this and who hasn’t had fish before, PLAN PLAN PLAN! Can’t stress that enough. Your future fish will thank you.
I wish I coulda read your blog 20 years ago when I setup my first tank. these are great instructions! I did everything backwards before… wasn’t pretty!
Can you do a post on starting a reef?
Wow that’s scary about soap residue killing fish. I don’t think enough people know this.